Stamped Matzah Place Cards
This is one of those ideas that feels questionable right up until the moment it works. Don’t think I fully relaxed until the icing had set and the final letter was stamped. But! It did work, and the result was even better than I’d hoped. Before you rush out to buy mini alphabet stamps and gel food coloring, a quick note on timing: This is a multi-day project. The process itself is straightforward and totally doable, but the royal icing needs a full 24 hours to set before you stamp anything. (Truly set—which might not just be “overnight.”) That firm surface is what allows you to press the letters cleanly into the matzah without denting or smudging the icing. Skip the wait, and you’ll end up with impressions that sink rather than stamp.
In other words: patience is the secret ingredient here. I promise it’s very very worth it.
Stamped Matzah Place Cards
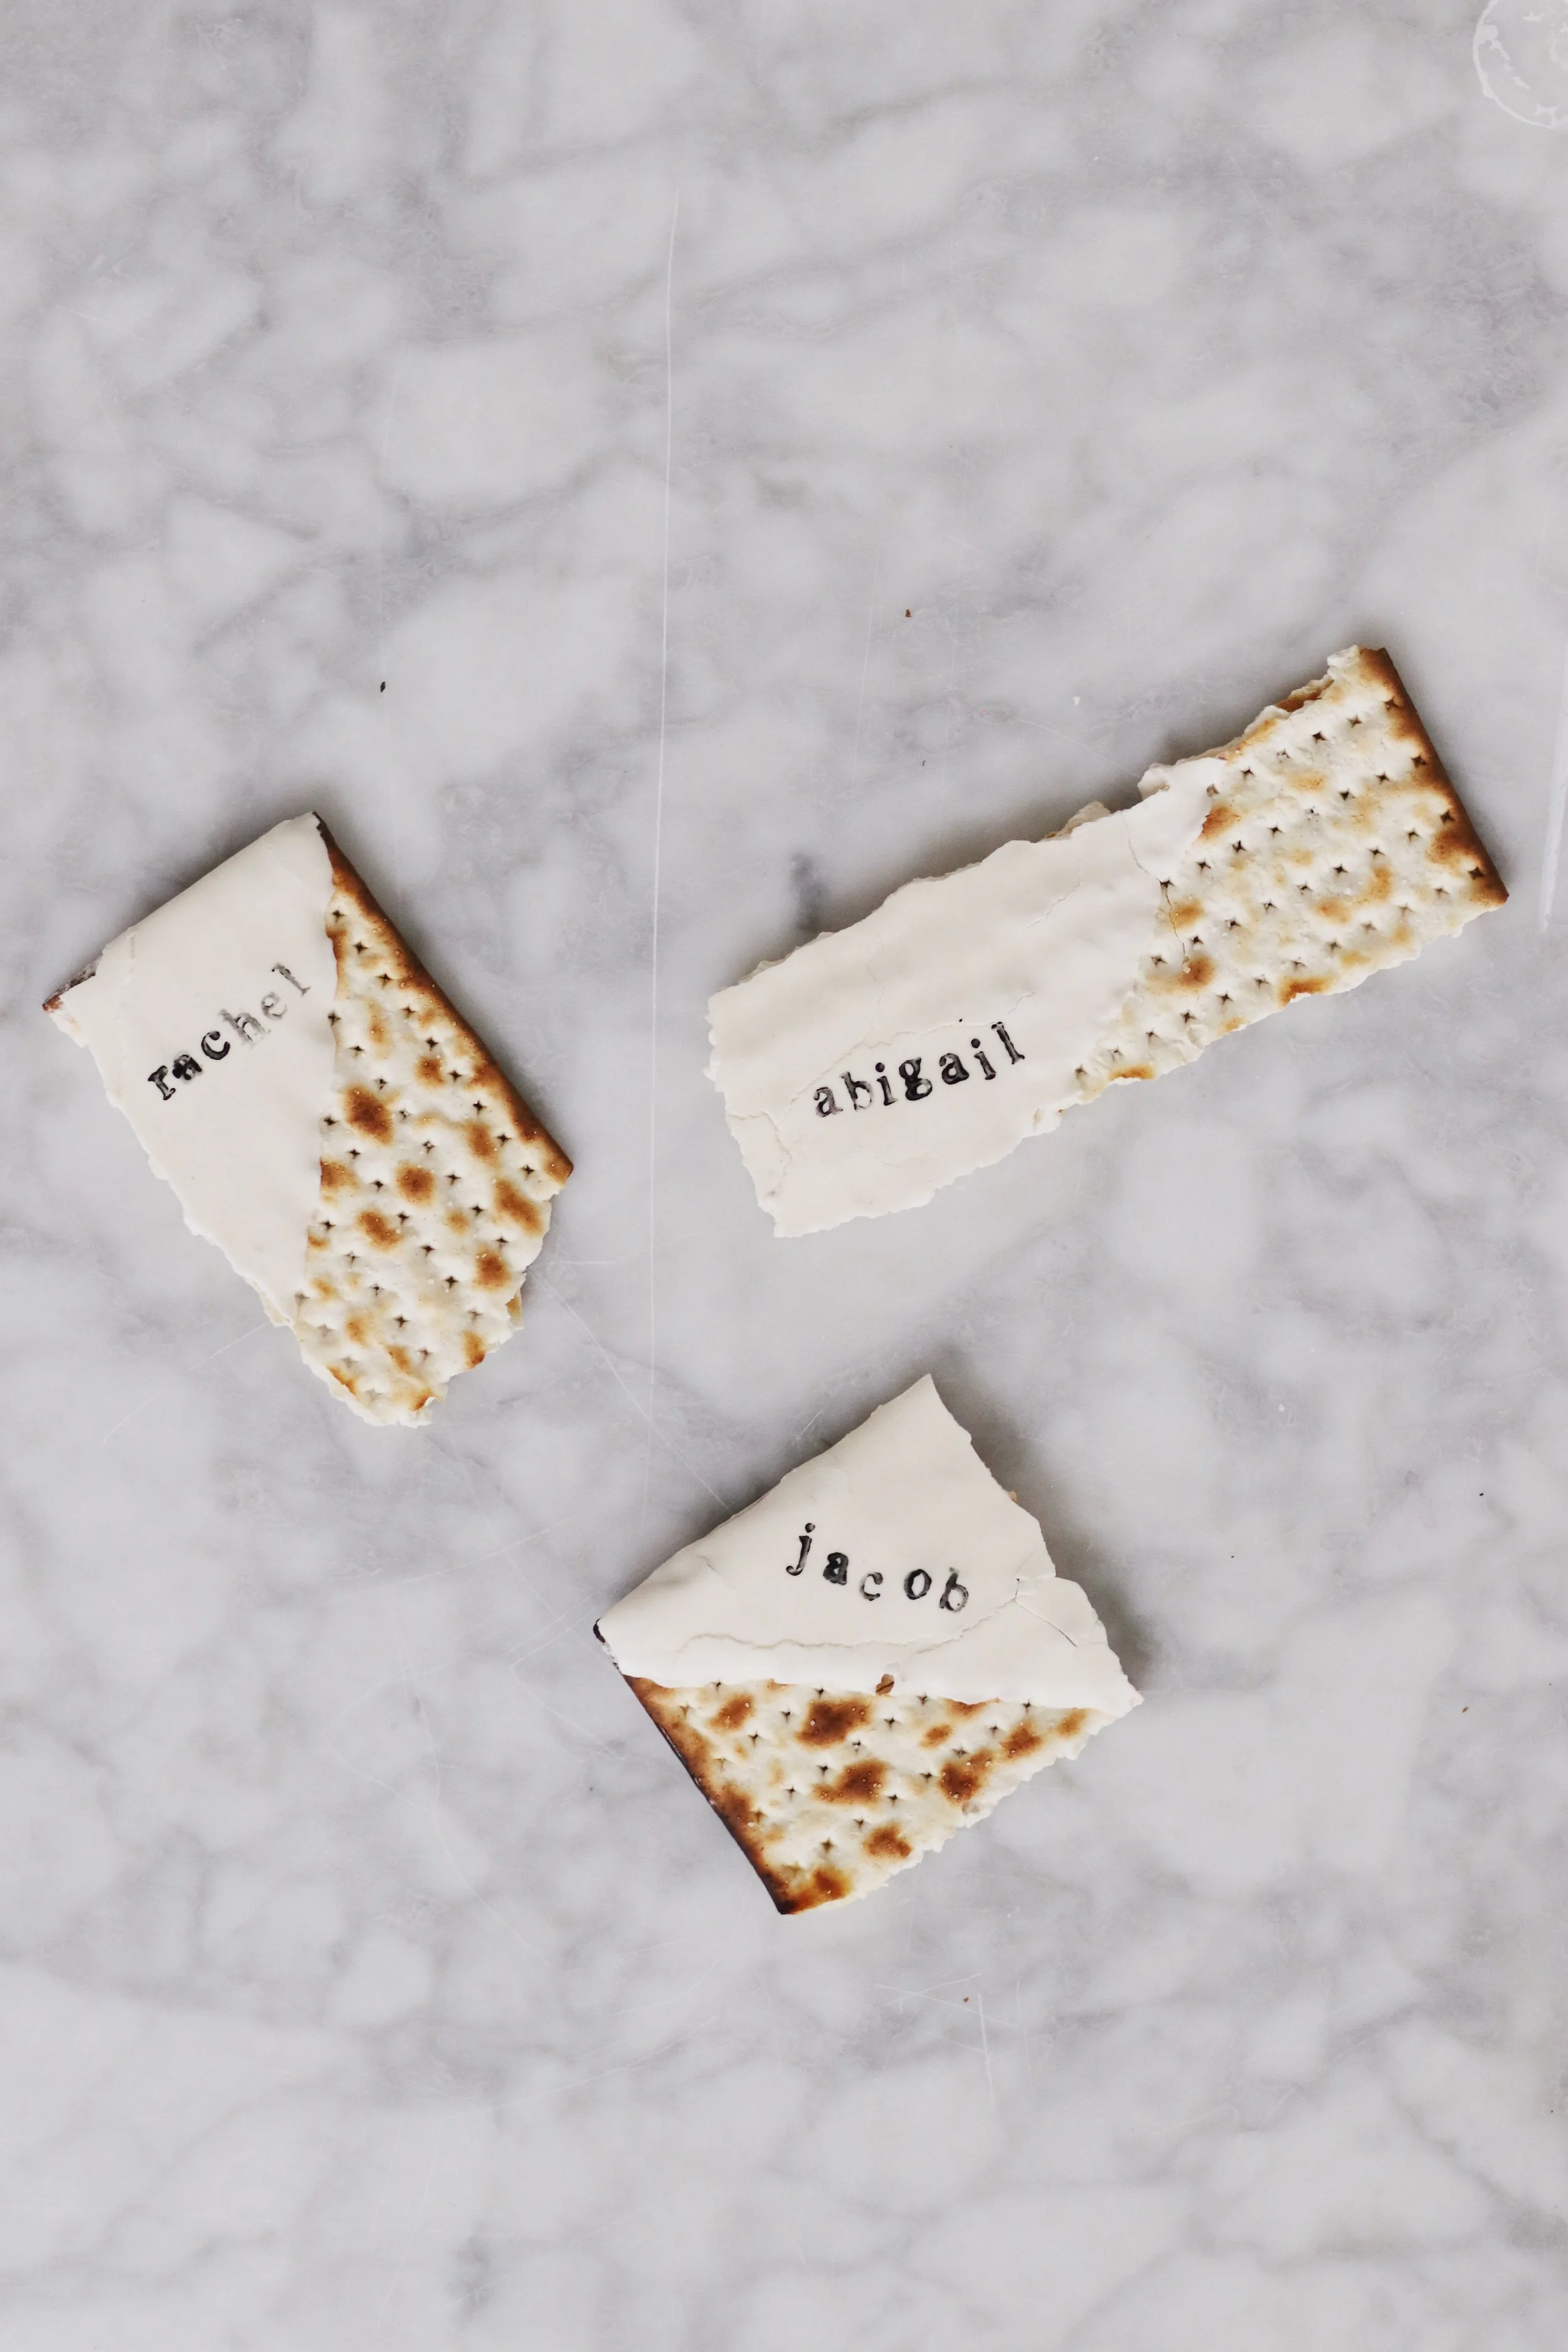
Line a large baking sheet with parchment paper. Working one at a time, dip each piece of matzah into the prepared royal icing, leaving a small portion uncoated so it’s clear there is matzah beneath the icing. Use a spoon, dinner knife, or offset spatula to scrape off any excess icing. You want a layer that’s thick enough to create a relatively flat surface for stamping, but not so thick that it takes days to set.
Arrange the iced matzah pieces in a single layer on the prepared baking sheet. Plan to ice more pieces than you’ll ultimately need, allowing for breakage, mistakes, or the occasional typo. Let the matzah dry at room temperature until the icing is fully hardened, at least 24 hours and up to 2 days.
Once the icing has set completely, prepare for stamping. Transfer about half of the gel food coloring to an empty stamp pad, adding more as needed to fully saturate it. Using the back of a spoon, a dinner knife, or an offset spatula, spread the coloring evenly into the pad until absorbed. (You may want to wear gloves to avoid staining your hands.)
When the pad is evenly inked, select your stamps and begin stamping the matzah. Set the finished place cards aside and let the ink dry for at least 20 minutes before handling or displaying.
3 cups royal icing (this is a great recipe, but if you don’t have/can’t find meringue powder, this is a great alternative, and here’s a dairy-free option)
6 sheets matzo, broken into small pieces (one piece for each eventual “place card,” but note that you’ll absolutely want to make EXTRA—double your intended Seder guest count, if you can swing it!—because they may break as you get the swing of stamping, and/or you may not be satisfied with your stamping results at first and want to start over on a “blank” card)
4.5 ounces black gel food coloring (you’ll need enough to fully saturate an ink pad)
Clean rubber alphabet stamps
A stand mixer or electric hand mixer
Large baking sheet
Parchment paper
Latex gloves (optional)
Patience! Two days of it, to be exact (see notes below about the multi-day nature of this project!)
Notes:
Make extra matzah pieces—ideally double your intended guest count, if possible. Some pieces may break, and it often takes a few tries to get comfortable with stamping pressure and alignment.
While 24 hours is sufficient drying time, thicker areas of icing may benefit from 36–48 hours. If the icing isn’t fully hardened, it can give way under the stamp and blur the impression.
Royal icing consistency matters. Icing that’s too thin won’t set firmly enough; icing that’s too thick can be difficult to dip. If you’re new to royal icing, review a trusted recipe and troubleshooting guide before starting.
Set aside one iced matzah piece as a test surface to practice stamping. This helps you determine the right pressure and angle before working on the final pieces.
Apply firm but gentle pressure when stamping. Pressing too hard—especially if the icing hasn’t fully set—can cause the surface to dent.
Chocolate chips or other coatings are not recommended as a substitute for royal icing. Stamping requires a flat, very firm surface, which icing provides best.