Hanukkah Cheese Board
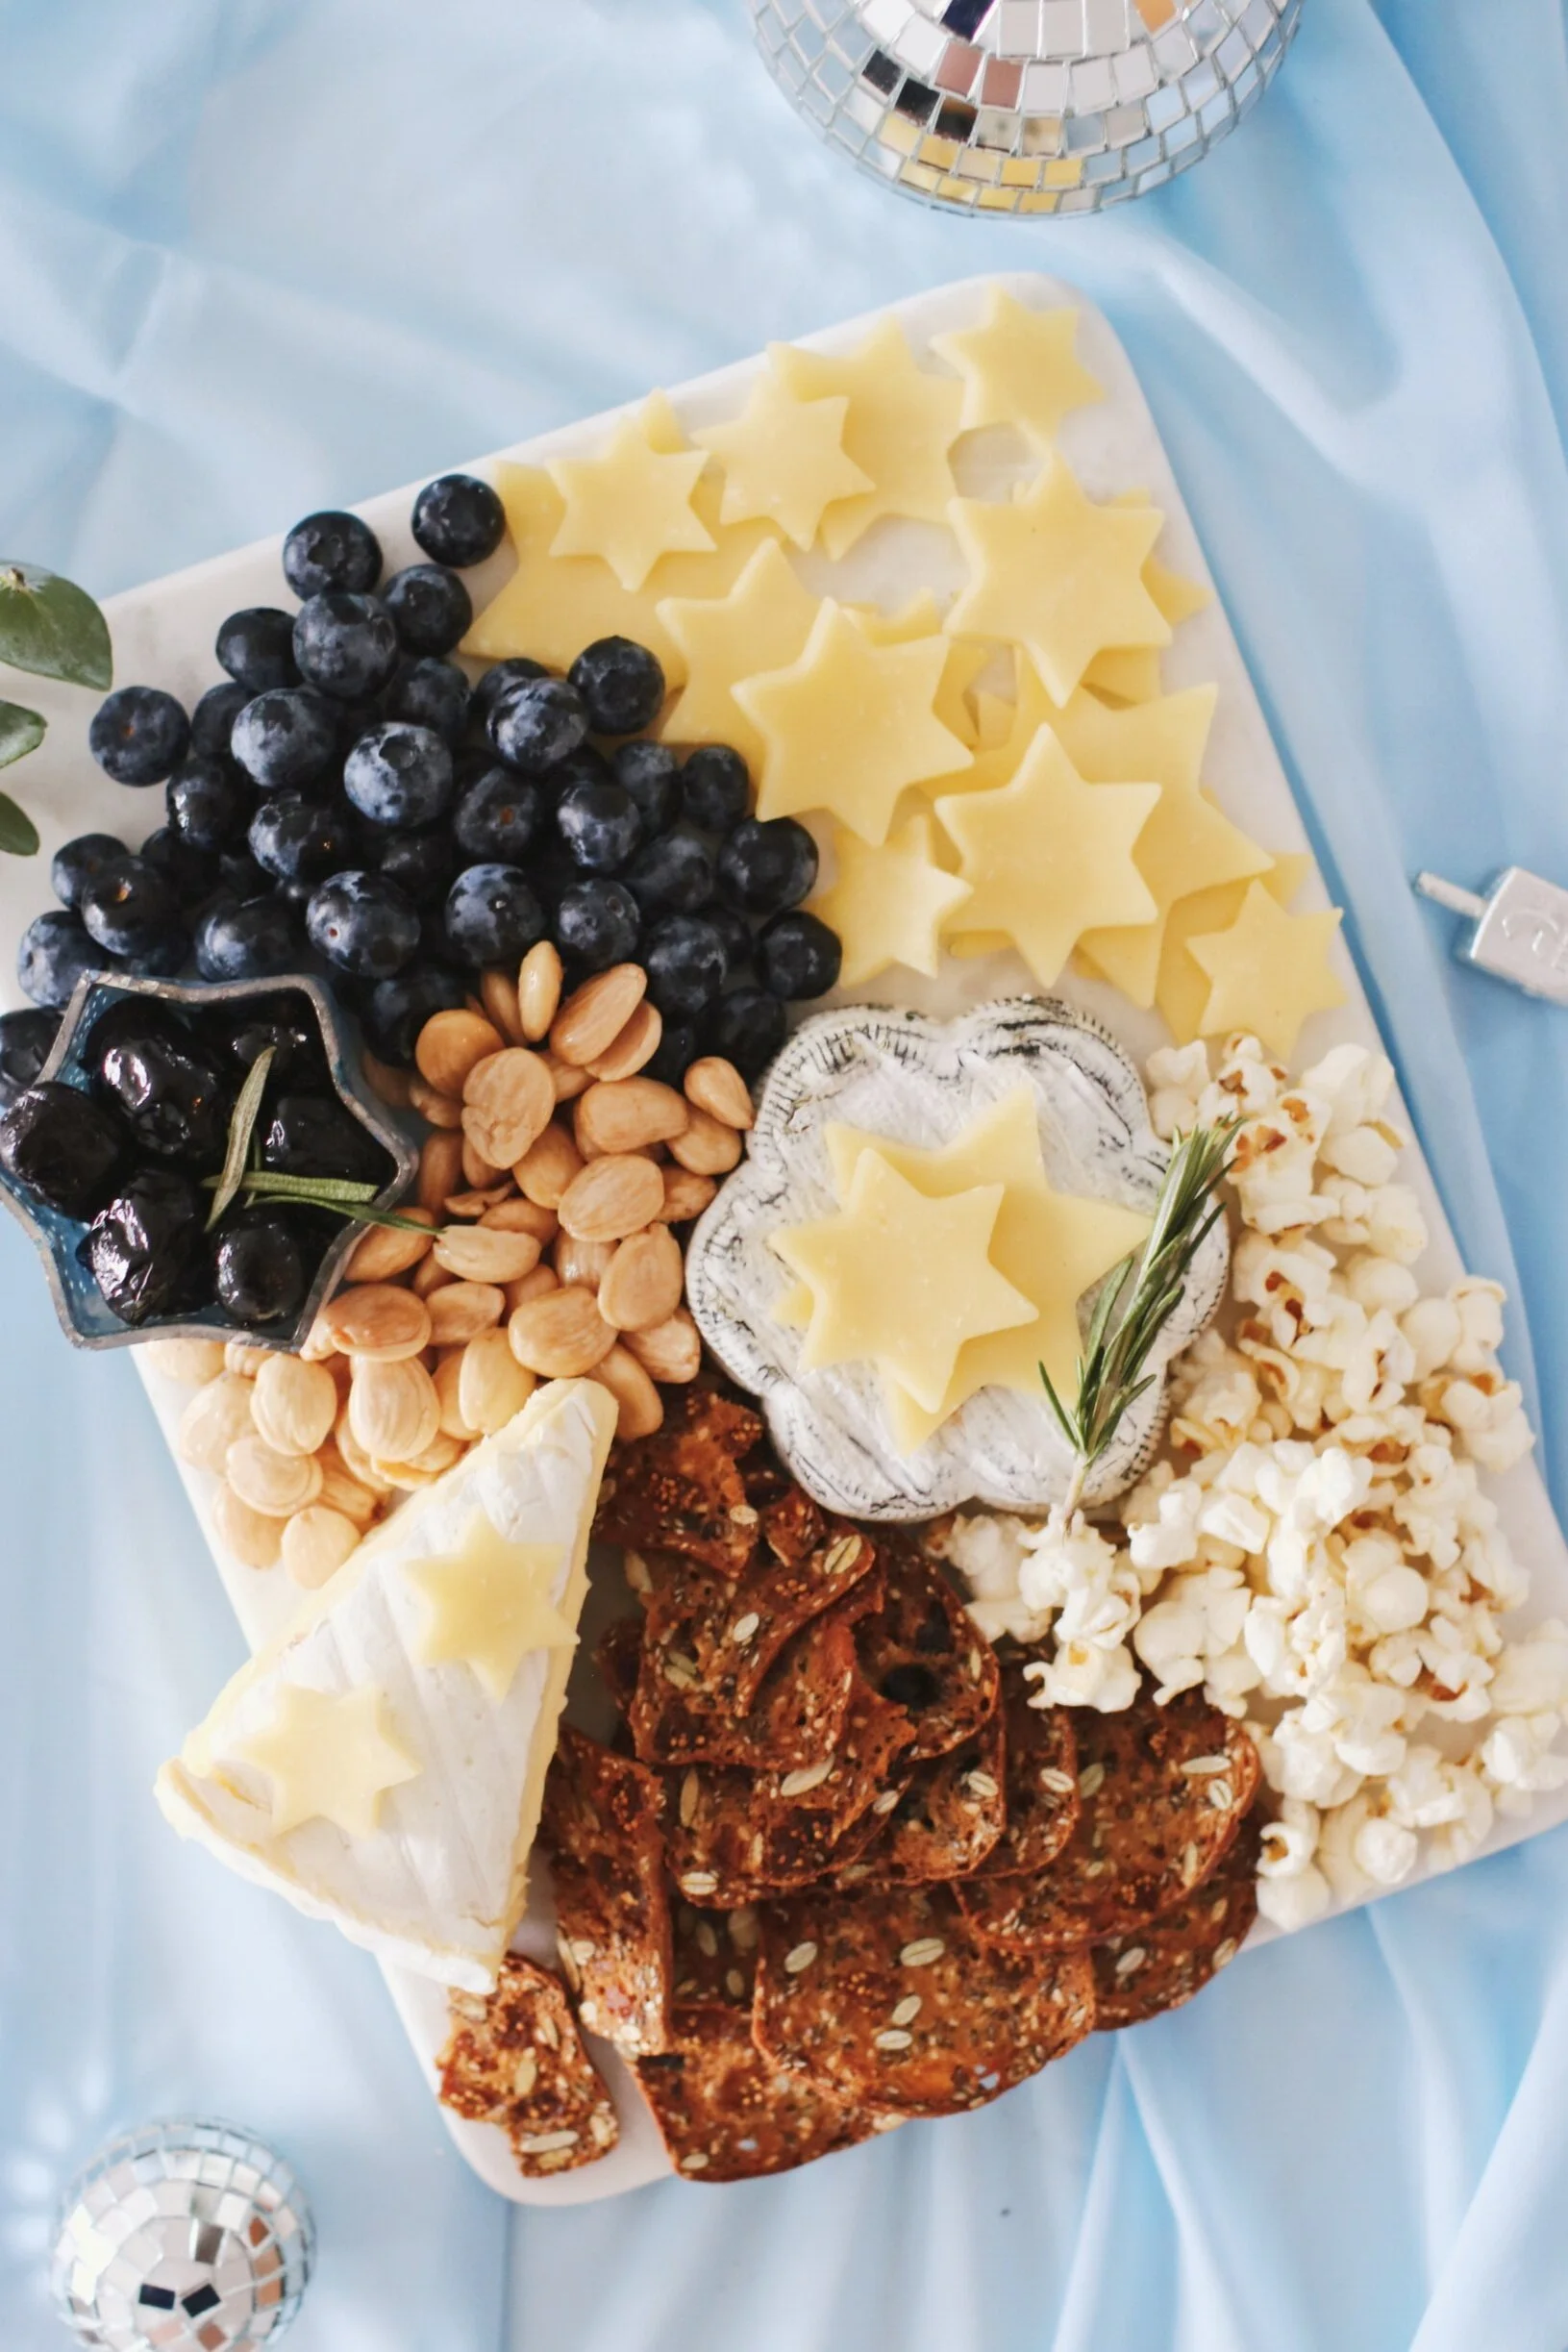
There’s a reason cheese boards have such a hold on us: they’re easy to assemble, require zero cooking, and let you feel creative without breaking a sweat. And, cheese. I made this one with Hanukkah in mind, starting with a tight color palette of whites, blues, warm golds, and a few deeper browns. For a finishing touch, I leaned into cookie cutters and added cheddar Stars of David.
What follows is a loose guide to building a Hanukkah board of your own. Think inspiration, not instruction! Use what you love.
Hanukkah Cheese Board
Marcona almonds
Black olives
Fresh blueberries
Popcorn
Crackers
A selection of 3+ cheeses
Extra-small Star of David cookie cutters (optional)
A flat cutting board or cheese board + small bowls for wet ingredients
Start by cutting stars from the thick-sliced cheddar using your cookie cutters. Using a few different sizes adds visual interest. Place the cheeses on the board first; think of them as anchors that everything else will build around. Scatter a few of the cheddar stars over the other cheeses to subtly tie the theme together.
From there, fill in the board with the remaining elements, working outward. Don’t worry if it looks a little messy—an organic, slightly imperfect arrangement is part of the appeal. Keeping to a consistent color palette helps everything feel cohesive; here, we’ve got mostly blues and warm golds.
Finish with a few small garnishes, then add serving utensils and a small bowl for olive pits. Cheese is best served at room temperature, so set the board out about 30 minutes before guests arrive. Serve and enjoy.